JBA HQ - Part 4 is the tenth single player level in Tom Clancy's Splinter Cell: Double Agent (Version 1). Undercover NSA agent Sam Fisher is ordered by John Brown's Army (JBA) leader Emile Dufraisne to shoot and kill Third Echelon Director Irving Lambert, Fisher's boss.
Briefing[]
Emile Dufraisne: We're on the edge of great things Fisher and I owe it all to you. Without your work we would have been betrayed, assaulted and killed. Instead, we're on our way back home with everything we need to succeed. Hamza is dead. The bombs are nearly ready and our allies are prepared to act. History will remember our names, Fisher, of that I have no doubt. Because of what you've done we're gonna set the world on fire.
Data & Transcript[]
Information[]
| Choices Objectives | |||
|---|---|---|---|
| 23:34 | JBA | Shoot Lambert. | |
| NSA | Shoot Jamie Washington. | ||
| Primary Objectives | |||
| 23:34 | NSA | Scan retina to access lock. | In order to reach the bomb and disarm it, it will be necessary to access the last level of security of the compound located beyond the retinal lock. Disable one of the main JBA member and use the retinal scanning software of your watch to obtain the sample. |
| 23:48 | NSA | Find and Defuse the Bomb. | Thanks to you, we know that the last red mercury device is on-site. You must find and neutralize it, for if it is triggered, it could devastate the greater New York City area. Neutralize Emile. [Timer 10:00, Hacking 00:20] |
| Profile Objectives | |||
| 23:34 | NSA | Obtain Retinal Sample [+2]. | The most secure areas of the compound are behind a retina-scan lock. A live group member might help you through. Otherwise, eyes taken from a corpse should open the lock. With these, you'll also help complete the profiles the NSA is compiling on the members of the JBA. |
| 23:48 | NSA | Find activity data [+1]. | In order to complete the NSA dossiers on the various core members of the JBA, we need you to get data on the group's activities and their roles in it. Uploading this information will help us create a more accurate prediction model for what they might do next – and will help us plan to stop it. [Search the closet in Jamie's office] |
| NSA | Obtain Retinal Sample [+2]. | ||
| Key Codes | |||
| 🔑 Code of server room is 6278. | |||
| 🔑 Code to Emile's office door is 2701. | |||
| 🔑 Code to Enrica's workshop is 1337. | |||
| 🔑 Code for the security room is 1269. | |||
| 🔑 Code to Jamie's office is 1234. | |||
| 🔑 Code to the main laboratory is 2112. | |||
| Pick Lock | |||
| 🔑 [Enrica's Room] 3-pins: ← ↑ → | |||
| 🔑 [Jamie And Stanley's Room] 3-pins: ← → ↑ | |||
| 🔑 [Enrica's Bedroom] 4-pins: ← → ↓ ← | |||
| 🔑 [Moss's Room] 5-pins: ↓ ↑ → ↑ → | |||
| Secret Objectives | |||
| 23:34 | NSA | Kill Stanley Dayton and Jamie. | Find and eliminate both Stanley Dayton and Jamie. |
| NSA | Eliminate all terrorists in the building. Find these men and eliminate them. [10+13] | The bomb... Stop it... Take them all out if you must... Whatever... it... takes... | |
| 23:48 | NSA | Kill Emile. | Find and eliminate Emile, guarding the bomb. |
Overview[]
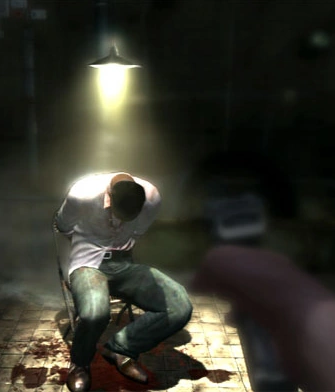
Fisher points a gun to Lambert.
Emile Durfraisne leads Sam Fisher to the interrogation room where he sees his boss, and friend, Irving Lambert bruised, bloodied and handcuffed to a chair. Emile states that they found him snooping around outside the building, looking for something or somebody. Jamie Washington, present in the room, asks Emile if he thinks that he's CIA, to which Emile replies that he doesn't care. Emile orders Fisher to kill him and leaves the room, leaving Fisher and Jamie inside of the room. Jamie gives Fisher the handgun and Fisher reluctantly complies to Emile's orders to maintain his cover and shoots Lambert, his boss and his best friend.[1]
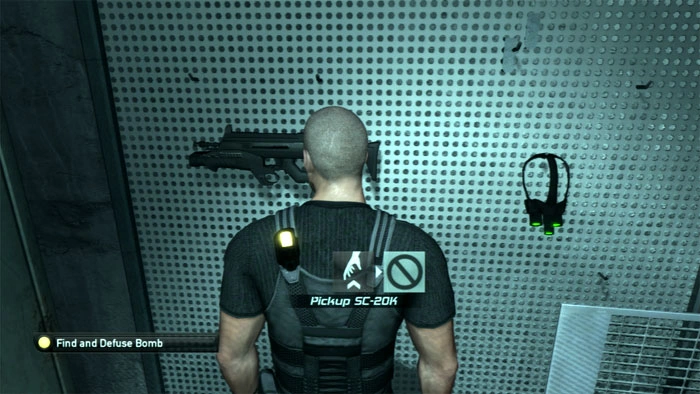
Fisher arrives in the JBA armory and retrieves his equipment.
Jamie then leaves the room as Lambert tells Fisher that he has to stop the Red Mercury bomb device before they detonate it, doing whatever it takes. Fisher reassures Lambert that help is on the way before leaving the room to defuse the bomb. Fisher heads to the armory first and recovers his equipment, then he moves through the server room and kills Stanley Dayton before moving into the restricted area. Still maintaining his cover, Fisher is able to move about the facility without any hostile attention from the JBA members. Fisher is able to recover his equipment and head towards the high-security area.
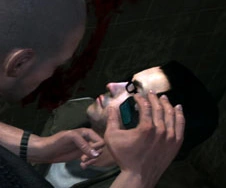
Fisher scans Jamie's retina after he killed him.
When Fisher entered the high-security area where the elevator is located, Fisher saw him and shot him. Jamie Washington was puzzled and refused to believe that Fisher was an undercover agent, dying by Fisher's hand. Fisher scans his retina and unlocks the elevator that descends to the lower areas. Emile begins the Red Mercury bomb timer and it's a race against the clock as Fisher must defuse it before it detonates. Fisher is able to get through the JBA guards patrolling the lower, high-security areas, neutralizing any opposition in the way. Fisher discovers guards in a room with the scientists, and after being told that the bomb is armed and they are staying put, attempt to resist.[1]
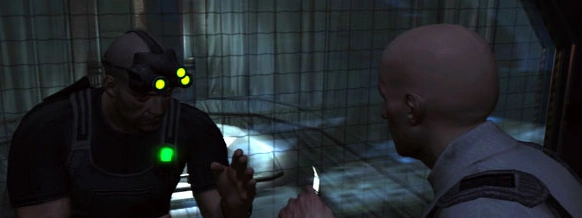

Sam and Emile fight, with Sam emerging on top and killing Emile. Fisher then turned his attention to the Red Mercury bomb and defused it.
The JBA guards kill the scientists and patrol the area, Fisher continues through until he finally makes it to the final area. Fisher is able to kill Emile Dufraisne and defuse the bomb that was armed, effectively disabling it. SWAT officers infiltrate the JBA Headquarters and secure all the areas before arriving to the room where Fisher defused the bomb. They breached the room and discovered nobody inside. Fisher was able to knock out a SWAT officer and run from the NYPD officers through the streets of New York City, eventually able to elude them and reach the Coast Guard boat that the last JBA member active, Carson Moss, was on. Fisher had to eliminate Moss and defuse the last Red Mercury bomb device.[1]
Trivia[]
- If Sam only saves one out of three, or two out of three with NSA trust below 33%, he is captured by the NYPD, charged with murder and conspiracy to commit terrorism, and pleads 'not guilty'. Before his trial begins, however, Sam breaks out of prison and is on the run.
- If Sam does not save any of the three, or only one with NSA trust below 33%, he is initially captured by the NYPD, but escapes using a smoke grenade.
- Otherwise, there will be a bonus mission after the credit rolls.
- Interestingly, whether Fisher shoot Lambert or not, the NSA trust has no effect. Also this is the only time that depleting a faction's trust and not fail the mission.
- If you decide to shoot Lambert, the JBA trust will gain at least 25%, however, once you enter High Security Corridor, regardless of being alerted or not, the JBA trust will automatically go to zero, and all the JBA personal will turn hostile.
- It is canon that Fisher shoots Lambert (to maintain his cover), kill each remaining JBA member, escape the police and kill Carson Moss in the last mission. There are choices during the story that can change the way they game ends, but these are the canon choices Sam Fisher makes.[1]
- This scene is foreshadowed in the Double Agent intro video (and trailers), where Fisher describes how he 'used to be a hero.' The JBA members are played by real-life actors, including Lambert, but Fisher is a CG render. In the video, Emile Dufraisne tells Sam that they have a problem and hands him a gun (as he reads over plans). The video transitions to show Lambert tied to a chair, and tells Fisher to 'finish his mission'. Fisher points the gun and shoots it.
- It's worth noting that Fisher's facial expression shows regret when he pulls the trigger. Additionally, Fisher uses a different handgun (M1911/Beretta 92), but during actual gameplay, in the final product, Fisher uses a Pistole Parabellum (Luger).
- This scene is foreshadowed in the Double Agent intro video (and trailers), where Fisher describes how he 'used to be a hero.' The JBA members are played by real-life actors, including Lambert, but Fisher is a CG render. In the video, Emile Dufraisne tells Sam that they have a problem and hands him a gun (as he reads over plans). The video transitions to show Lambert tied to a chair, and tells Fisher to 'finish his mission'. Fisher points the gun and shoots it.
- There is no penalty for killing in this mission.
- There are special animations (not basic grab animations) that commence when the player grabs certain JBA members. In this level, Emile Dufraisne and Enrica Villablanca (if the player decided to allow the bomb on the cruise ship to explode) are the two members that will have unique animations. Enrica is actually grabbed, however, Emile is given a quick CQC-fight with Sam before being killed.
- It is actually possible to knock out Emile, however, it is confirmed that Emile dies by Fisher's hand.[1]
- The Luger used to shoot Lambert (or save him) marks the second time it's used in the game: the first time it was used was when Fisher was ordered to shoot Cole Yeager.
- Fisher grabs his equipment in the armory (Multi-Vision Goggles and SC-20K M.A.W.S.), normally the armory door is locked and there is a JBA member inside. In this level, however, the door is unlocked and the JBA member usually sitting at the desk isn't sitting there.
- The cutscene of Lambert being shot by Fisher is briefly shown in Splinter Cell: Conviction, during the elevator descent in Third Echelon HQ level as Fisher thinks back to different events that he's been through, his face showing regret.
References[]
[]
| ||||||||||||||||||||||||||