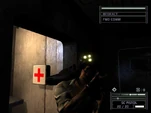
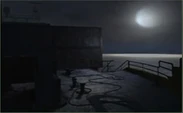
Cargo Ship is the second solo campaign level in Tom Clancy's Splinter Cell: Chaos Theory. Splinter Cell agent Sam Fisher infiltrates a cargo ship, the Maria Narcissa, to find and eliminate Hugo Lacerda. Lacerda, a guerilla leader of People's Voice, may have sensitive and dangerous information regarding the Masse Kernals, meaning he must be eliminated before the information is leaked.
Briefing[]
Hugo Lacerda managed to get away from the lighthouse aboard the Maria Narcissa before you could get to him. Board the ship, locate him, and make sure that he is never able to communicate what he may have learned from Morgenholt.
Data & Transcript[]
Information[]
| Primary Objectives | |
|---|---|
| Eliminate Hugo Lacerda. | Hugo Lacerda has been elevated to Third Echelon's target of opportunity list. Take advantage of any possible opportunity to remove him from the list. |
| Find out which cabin Lacerda is in. | Interrogate the captain, or check the ship's register in the main computer room to find out which room Lacerda is in. |
| Retrieve the ship's transit ledger for Lacerda's shipment. | A computerized ledger will be kept in the ship's office. Access this ledger to determine who facilitated the delivery of the arms to Lacerda. |
| Retrieve the bill of lading for Lacerda's arms shipment. | The arms used to pay Lacerda were shipped in a large crate, located in one of the cargo holds. Locate and read the bill of lading mounted on the side of the crate. |
| Exfiltrate to the extraction point. | Steal the ship's launch, mounted on the stern, to escape the ship. |
| Secondary Objectives | |
| Find the name of Lacerda's Panamanian contact. | In addition to those shipping and receiving the weapons, someone must also have helped Lacerda get them past new security inspection protocols at the Panama Canal. Find out who. |
| Opportunity Objectives | |
| Place tracking devices on any illegal weapons crates. | Planting tracking devices on the remaining crates that Lacerda is delivering to his allies and supporters may assist in future intelligence operations. |
| Bonus Objectives | |
| Interrogate Hugo Lacerda. | |
| Notes | |
| 🗣 [Lambert] The ship has an active alarm system. Be careful. | |
| 🗣 [Talk/Interrogate] Lacerda is being guarded by professional mercenaries. | |
| 🗣 [Redding] The flooded compartments can be drained using the pump in the forecastle. | |
| 🗣 [Grim] Lacerda's shipping container is located in the flooded forward-most hold. | |
| 🗣 [Grim] There is a gas leak in the engine room. Any firing will cause an explosion. | |
| 🗣 [Grim] The captain will know which room Lacerda is in. | |
| 🗣💻 [Interrogate/Computer] Lacerda is in the captain's quarters, below the bridge to the stern. | |
| Alternate Notes | |
| 🗣 [Captain Were Stunned] The server in the room on the top deck will list Lacerda's room assignation. | |
| 📢 [Alarm Stage 2] Enemies are wearing body armor. | |
| 📢 [Alarm Stage 3] Enemies are wearing helmets. | |
| 📢 [Alarm Stage 4] Enemies have fortified their positions. | |
Overview[]
After learning that Hugo Lacerda is aboard the cargo ship named the 'Maria Narcissa', Third Echelon gave Sam Fisher the vital objective of eliminating Hugo Lacerda so that he can never reveal what he may have learned from interrogating Bruce Morgenholt. To get Fisher onto the boat, Third Echelon arranged a drop with the help of the USS Clarence E. Walsh's Captain, Arthur Partridge, in order to get Fisher onto the target. Once Fisher made it onto the stern of the cargo ship, with Third Echelon Director Irving Lambert revealing to Fisher that the boat does have an alarm system in place. Lambert states that while the mission will not fail if he reaches a three-alarm level, it will make the mission more difficult the more alarms that are accumulated. Fisher starts by sneaking through the ship and meeting one of the large open cargo rooms with numerous crates located inside. William Redding contracts Sam on his earpiece and tells Sam that if he places tracking devices on the weapons crates, they may be able to find out where the weapons are going and coming from.
As Fisher continues through the tight cabins, Redding notifies Fisher that the Maria Narcissa is reporting a leak. Fisher replies by asking if the ship is sinking, to which Redding states that it isn't since it's contained. Fisher is told that he'll have to find the release valve in order to drain the affected, making them accessible. Fisher finds the water pumping room where two guards patrolled the immediate area. Fisher was able to activate the release valve and drain the rooms, making them accessible. Upon coming near the engine room, Anna Grímsdóttir notifies Fisher that his suit is giving off readings that there is a leak in the engine, causing gas fumes to fill the air. It's deduced that one spark could be enough to cause an explosion, with Grím telling Fisher to not assume that the enemies in the room are smart enough to realize that.
Fisher soon discovers the location of Hugo Lacerda; he is staying in the captain's cabin along with some mercenaries that are protecting him. Lacerda gets up from the table and tells the mercenaries that he's going to get a drink. He enters the next room and digs through the mini refrigerator, looking for rum. Fisher takes the opportunity to grab Lacerda and interrogates him. Lacerda explained he was contracted to kidnap Morgenholt and he was promised a good reward. Sam kills Lacerda and manages to escape using an escape boat from the stern of the Maria Narcissa.
Version 2 (PS2/GameCube/3DS)[]
- One of the biggest layout changes is to the officer/captain quarters where you find Lacerda. While Xbox/PC has a straight hall with two open rooms, a closed room with a guard listening to the radio, and a shower room on the other side, Version 2 instead has a hall way with a few turns and a patrolling guard in the hall. There are only two closed rooms across from each other after turning left at the hall, with the guard from Version 1 now sleeping rather than listening to the radio. The rooms with Lacerda and his bodyguards are more or less the same with the absence of the bathroom across from the kitchen.
- The guard using the loud equipment before climbing into the vent to activate the pump in the bilge room lacks the option to interrogate, one of the few instances where Version 1 actually has more dialogue than Version 2 which fairly consistently includes lines cut from Version 1 throughout the original trilogy.
- There are no dead enemies in the final statistics.
Trivia[]
- Irving Lambert references the earlier Splinter Cell games at the beginning of the mission. Fisher asks if it's three alarms and mission is over, to which Lambert replies, "Of course not. This is no video game, Fisher."
- This is the first mission in Splinter Cell: Chaos Theory to actually have alarms installed; the first mission did not have any central alarm, as pointed out by Lambert.
- This mission is unique by having a "no shooting zone"; the engine room has a gas leak, meaning if anyone fires a round the entire ship will explode. This is similar to the engine room in the Sea of Okhotsk mission in Splinter Cell: Double Agent, where Sam must not allow the captain to burn the fuel in the engine room of the RSS Rublev.
- Also, guards can light torches without blowing the ship up for gameplay reasons.
- In real life the crew of a ship knows how dangerous a gas leak is.
- The "no shooting zone" includes the entire engine room, it means the players are not safe to fire until they reach crew quarters from above. This includes using launcher projectiles.
- Like the many of the missions in Splinter Cell: Chaos Theory, there are multiple ways for the player to complete their objectives, as well as discovering the location of Hugo Lacerda (in the captain's quarters).
- If the captain is grabbed and knocked out, he will die regardless. (This can be seen using the heat vision in the Multi-Vision Goggles, also the kill will count in the mission debriefing that lower the mission score.) To avoid killing him, there are alternative ways to discover Lacerda's location (like finding the security room).
- This is not true for the PS3 HD version, he can be knocked out as usual.
- There six weapon crates that can be tracked; unlike the previous mission, the player has to interact with the crate by placing a tracking device on it, rather than simply scan it with their EEV.
- In the PS2 and PS3 versions, killing Hugo Lacerda is not counted at end mission screen.
- The screen sways in this mission, as to simulate the swaying of the ship.
- After grabbing Lacerda, Sam will kill Lacerda with a lethal strike, even if non-lethal button is pressed.
- Lambert won't mention fifth freedom in his briefing for the Japanese version.
Gallery[]
[]
| ||||||||||||||||||||||||||


